Budae Jjigae (Army Base Stew)

Korean Stew with bon chon side

Budae Jjugae is a classic.  It’s great for a night of drinking, and it’s super easy to make as long as you have access to an Asian market.

Budae Jjigae roughly translates to Army Base Stew.  It became popular following the Korean War when western rations were added into more traditional Korean soup; resulting in all the salty, savory goodness you can imagine.

I first enjoyed this stew over many Soju at Pocha 32, which I miss more than ever these (COVID) days.  This recipe is my first attempt, feel free to experiment.

Serves 2-4

Ingredients

For Sauce

  • 2 Tbsp gochugaru (Korean red pepper flakes)
  • 1 Tbsp mild gochujang
  • 1 Tbsp soy sauce
  • 2 tsp fish sauce
  • 2 tsp rice wine (I was out, so I used dry vermouth)
  • 1/2 tsp salt
  • 1/2 tsp ground black pepper
  • 3 Tbsp water
  • 4 cloves garlic, minced

For Stew

  • 2 packets ramen of your choice (not spicy, this will already be spicy enough)
  • 1 cup kimchi, chopped (roughly 1/4 head of cabbage)
  • 2 oz rice cake slices (optional)
  • 1/2 can of spam, sliced (I went with the garlic flavor, yum)
  • 4 hotdogs (and/or) Asian sausages, sliced
  • 1/2 package of firm tofu, sliced
  • 1/2 package of enoki mushroom, stems trimmed and separated
  • 2-3 green onions, sliced thin
  • 2 slices American Cheese

Other ingredients, which I didn’t have on hand

  • Kielbasa, sliced
  • Small can of baked beans (very traditional)
  • Glass noodles (for extra noodle)
  • Slices Zucchini

Step 1: Combine all sauce ingredients in a small bowl and whisk to combine.

Step 2: In a wide, shallow soup pot arrange the following in a nice-to-look-at fashion on the stove or on a tabletop burner if you have one.

  1. The contents of both ramen seasoning packets, spread evenly along the bottom of the pot
  2. Chopped Kimchi, piled in the center of the pot
  3. Rice Cake in a circle around Kimchi
  4. Alternating spam, hotdog and tofu slices along the outside
  5. Enoki mushrooms and green onion on top
  6. Pour sauce from step 1 in the middle of pot, on top of the kimchi
  7. Cover with roughly 4 cups tap water until all veg and meat are just submerged
  8. Place 2 slices of American Cheese right on top

Step 3: Turn on burner and bring it to a boil.  You can cover with a lid to get it started faster, but make sure to uncover once it’s boiling away.

Boil for 5 minutes on high, then break both ramen noodles in half and add into the broth.

Ramen added

Boil 3 more minutes, stir and serve.

Traditionally, you can start eating before adding the noodles, leaving the soup on low.  The noodles make a nice second course if you want to eat it in parts.

If you leave the soup on low, just make sure to add more water as needed – the soup will start to cook down and dry out otherwise.

Boiled and ready to serve

Hangover Pasta

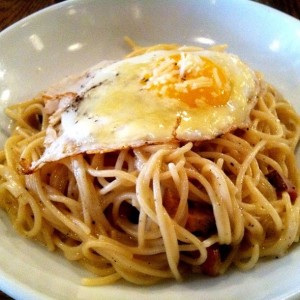
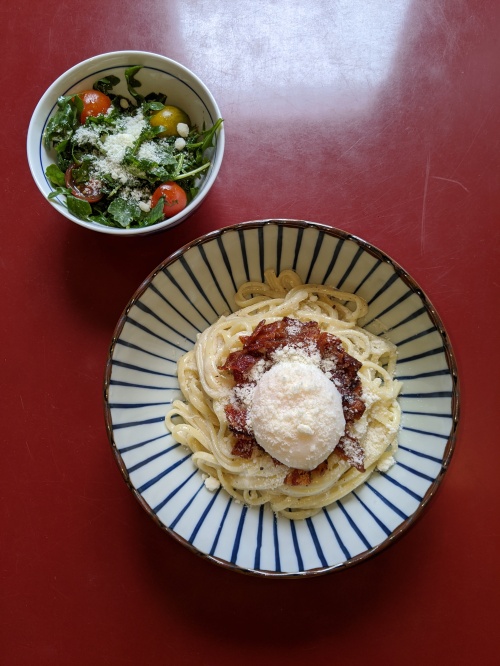
Brunch pasta with sous vide egg on top

My old go-to midtown restaurant, Resto (RIP 2016) used to make something called Hangover Pasta for brunch.  It was rich and creamy and covered in bacon and eggs, and definitely served it’s purpose after a big night out.

resto brunch pasta with egg on top

A picture of the original dish that inspired this post – found on an old open table page

Looking for a weekend project to cure the COVID boredom I decided to take a stab a recreating this old friend. (and thank you America’s Test Kitchen for the cacio e pepe base inspiration)

Serves 2

Ingredients

——————

  • 1/2 box of dried pasta (your choice, but spaghetti and think linguine are best)
  • 1 cup finely grated Parmesan cheese, plus more for topping dish
  • 1 tbsp heavy cream
  • 1 tsp olive oil
  • Fresh ground black pepper
  • 4 strips bacon, cooked and crumbled
  • 2 poached or fried eggs (I recommend sous vide, instructions below)

Bring a large pot of well-salted water to boil and cook pasta as instructed on the box.  About 8 minutes to just past the point of al dente.

While pasta boils, add 1 cup grated parm to a medium-sized mixing bowl and set aside.  You should also brown your bacon and poach your eggs while the pasta cooks if you’re not sous vides.

When pasta is done, reserve 1 cup pasta cooking liquid, then drain pasta in a large colander.

Add 1/2 cup pasta cooking liquid to the bowl of parm and whisk until cheese is melted and smooth.  Whisk in 1 tbsp heavy cream, 1 tsp olive oil and a good amount of fresh ground black pepper.

Add pasta into the bowl with cheese and toss with tongs until all pasta is well coated.  You can loosen up the cheese by adding a little extra cooking liquid if needed, but it’s best to keep this on the thick side.

To serve, divide cheesy pasta evenly between to serving bowls and top with poached egg and a sprinkling of crumbled bacon.  Enjoy.

To sous vide your eggs:

Set up your sous vide and bring water up to 167°F/75°C.

Once water is at the right temperature, place two large, non-cracked eggs, still in their shell, into the water bath (you can make a dozen this same way if you want more eggs). No need to put this in a plastic bag, the shells make their own container.

Sous vide eggs for 12 minutes, then remove from water bath with a slotted spoon and place in a bowl of ice water for 1-2 minutes until cool enough to handle.  Note: if you start your eggs when the pasta goes in to cook, everything should be done at the same time.

When ready to serve, crack the top 1/3 of each egg off and carefully remove any loose shell.  Eggs should then slide out of the bottom 2/3 shell and right on to the top of your pasta for eating.

Yolks will be runny and perfectly complement your cheesy pasta.

Brunch pasta with arugula salad on the side

02.04 – Super Bowl: Supper Sunday

It’s been 2 years.  I’m sorry.  Thank you work-friend, Isabelle, for the nudge.

Recently (you know, within the past 2 years) I’ve acquired a new roommate, Joe (a frequent Sunday Dinner guest), and we’ve begun watching a lot of old Cook’s Country and America’s Test Kitchen together.  After watching the episode on authentic New Orleans Muffuletta, we formed a plan to try this out for the annual Dever Super Bowl (Pot-luck) Party.

2017-02-04-18-12-33

Cook’s Country’s Muffuletta
——————

  • 2 cups drained Giardiniera
    • Well I couldn’t find this in my standard NYC grocery store, so I subbed the following:
      • 1/4 cup cauliflower florets, finely chopped
      • 1 small carrot, finely chopped
      • 4 pepperoncini, stemmed
  • 1 cup drained pimento-stuffed green olives
  • 1/2 cup pitted kalamata olives
  • 2 tbsp drained capers
  • 1 tbsp red wine vinegar
  • 1 clove garlic, finely chopped
  • 1 tsp dried oregano
  • 1 tsp dried thyme
  • 1/2 tsp red pepper flakes
  • half cup olive oil
  • handful of fresh parsley leaves
  • 1 lb store bought pizza dough
  • 1 egg, beaten
  • a few tbsp sesame seeds
  • 1 lb, of each deli meat below, sliced thin
    • Salami
    • Pepperoni
    • Mortadella
    • Sweet Sopresetta
    • Capicola (note, NYC let me down here too, so I went with hot sopressata)
  • 1 lb, sliced provolone cheese

Day 1: Combine all ingredients from Giardiniera to parsley in a food processor and pulse to make a paste.  Store in fridge overnight.

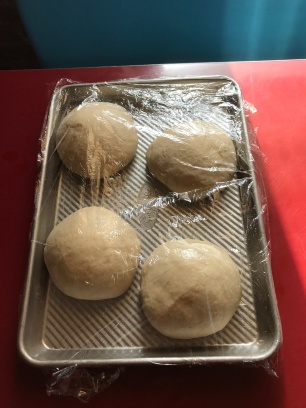
Day 2: Set out pizza dough for one hour allowing it to come to room temperature.  Form 2 balls and let sit on a greased cookie sheet under greased plastic wrap for 1 hour to rise. Note- I doubled the batch and made 4.

2017-02-04 13.20.42.jpg

Pre-heat oven to 425.

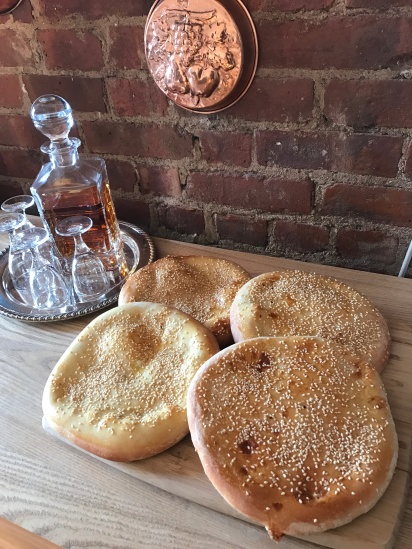
Press dough into 2 rounds about 7″ wide.  Brush lightly with scrambled egg and sprinkle on sesame seeds.  Bake at 425 for 18-20 minutes until just starting to brown and sound hollow when tapped with a finger.  (CC says to rotate your pan half-way through cooking)

2017-02-04-14-19-21

Let cool on a wire rack for 1 hour.  Set out olive paste to warm up while bread cools.

2017-02-04-15-12-37

Slice bread through center like a large hamburger bun, and spread 1/4 of olive paste on the insides of each slice of bread.  Top with all deli meats and provolone and wrap firmly in plastic wrap.

2017-02-04-18-08-44

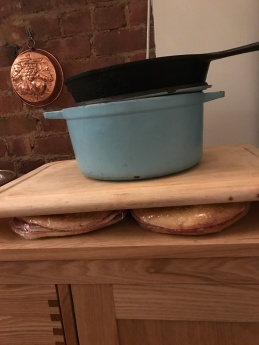
Using a dutch oven, or other heavy object press sandwiches under a cookie sheet or cutting board for one hour. Slice into wedges and serve (or you can marinate up to 24 hours in the fridge – like me overnight).

2017-02-04-18-36-02

Results
——————

No left-overs to speak of.

Scoops says: This is better than New Orleans.

Screen Shot 2017-02-06 at 3.16.45 PM.png

02.06 – Kimchi School

Last Nov 8 my friend Annie Ha invited me over to spend a day making Kimchi.  When she started sending me various recipes, in Korean, I immediately cleared my schedule.

The day involved many adventures into Chinatown (closer to Annie than Koreatown) for ingredients and containers, as well as an impromptu lunch of conch and frozen fish balls.  The conch looked like dirty shells with black turds hanging out of them (I was secretly terrified), but Annie boiled them up, rotated them out of their shell with a chopstick and mixed up some vinegar and red pepper paste to dip them in, and they ended up being fantastic.

Screen Shot 2015-02-07 at 4.02.01 PM

This recipe is adapted by Annie from original Korean.  It makes about a year’s worth of Kimchi and requires a full shelf of fridge space to store…but I have already eaten almost all my batch at the 2 month mark.  I blame Annie for teaching me how to make Kimchi pancake, and uncle Steele for encouraging Kimchi soup and stir fry.

Kimchi
——————
5 Napa cabbages
9-10 cup Solar Salt

1 large Daikon radish, peeled and julienned
25 garlic cloves
5 knobs ginger, peeled
1 bunch Chinese chives*, chopped into same length as radish
3T salted shrimp
(http://www.maangchi.com/ingredient/salted-shrimp)
1 1/2 cups raw fresh shrimp, peeled and tails removed
5 cups korean red pepper powder
(http://www.amazon.com/Korean-Pepper-Coarse-Powder-Pounds/dp/B005OJUSZE)
1/2 pear
1/2 apple
6 tbsp Rice Powder (Optional, good for consistency)
1 cup Korean Fish Sauce (Annie thinks we used anchovy)
3 tbsp sugar

2 large clean buckets (dry wall sized)
2-3 large tupperware containers with tight-fitting lids for storage (or non-reactive glass jars)

* These are long and flat.  If you can not find, regular chives or green onion would substitute okay

First Salt the Cabbage

Cut each cabbage into 4 quarters. Only cut half way from the bottom and and rip with hands, so each quarter’s leaves are still attached at the root.

In a large bucket, prepare 5 cups of salt dissolved in 8 liters of cool water.

Submerge the cabbages in the salted water for 5 mins.

Take cabbage out from the salt water and pack salt between leaves of each, focusing on the tough part near the root (use about 4 cups of salt for 5 cabbages).

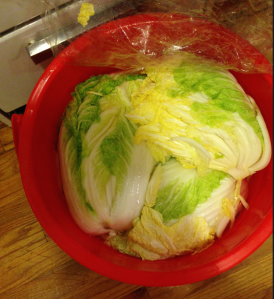
Put the cabbages back into the salt water. Lightly cover to keep out dust and cure at room temperature 7-8 hours (keep the bucket in a cool place -outside maybe if your kitchen is warm).

Screen Shot 2015-02-07 at 4.03.01 PM

4-5 hours in, Prepare Sauce

Optional, but adds to texture: Combine 3 cups of water and 6 tbps of rice powder and boil on medium heat for 7 mins to create a thick paste.  Let cool as you combine other ingredients in another large bucket.

In a Food Processor or blender, combine raw shrimp, salted shrimp, pear, apple, garlic, ginger, fish sauce and 2 tbsp salt.  Process into a fine paste.

Add both shrimp and rice powder pastes to second bucket and mix in 5-6 cups of pepper powder, 4 Tbsp salt, 3 tbsp sugar (using your hands works best.)

Mix in Chinese chives and radish. Cover lightly with plastic wrap and let marinate a few hours until cabbage is ready.

Screen Shot 2015-02-07 at 4.04.01 PM

7-8 hours in – wash salted cabbage

Rinse cabbages in tap water throughly 2-3 times until all visible salt is removed.  Drain cabbage at least for 1 hour.

Once cabbage is drained – combine with sauce

(Reserve 1 quarter salted cabbage if making Bo Ssam dinner)

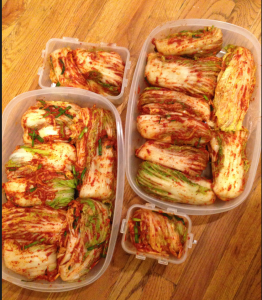
Using your hands, individually insert sauce mixture into each drained cabbage quarter, working to get some sauce in between every leaf.  Wipe off excess sauce from root end down to leaves and curl leaf end around itself to create a solid second end (see picture) and place into tupperware.

Screen Shot 2015-02-07 at 4.04.58 PM

Store in airtight bin on counter at room temperature for 3 days.  If your house is warner than 68 f, consider keeping outside or in the basement.

Screen Shot 2015-02-07 at 4.05.57 PM

Refrigerate.  Kimchi is ready to eat in about 1 week, and will last all year in the fridge.

Screen Shot 2015-02-07 at 4.07.26 PM

Bonus Bo Ssam Dinner

Annie explained that Bo Ssam is a traditional dinner to eat after a day of making kimchi as it provides all the ingredients you need, and doesn’t require a lot of fuss (you have been slaving over Kimchi all day at this point, a simple dinner is necessary).

Note: Image below is a recreation where I tested both roasted and boiled pork belly.  Joe preferred roasted, I preferred boiled…choose for yourself.

Screen Shot 2015-02-07 at 4.08.52 PM

——————
1-2 lbs Pork Belly
1 tbsp salt shrimp
1 quarter salted cabbage (reserved from Kimchi)
Reserved Kimchi sauce left over from from packing cabbages
Steamed Rice

Cover pork belly with water in a small pot/sauce pan, add salt shrimp and boil 1 hour until tender.

Cut belly into bite-sized slices and serve with reserved cabbage and sauce.

To eat make a cabbage leaf “taco” with belly, sauce and rice inside.

03.16 – Braised Corned Beef and Boiled Cabbage

Growing up, my mother made a boiled corned beef dinner every year for St Patrick’s day.  Not wanting to break from tradition, I decided to dust off Sunday Dinner, after almost 6 months, and invite some friends over to Joe’s for a St Patrick’s Day feast.  This recipe is adapted from Cooks Illustrated and couldn’t be easier.

Image

Braised Corned Beef
——————

1 4-5lb Corned Beef, drained and rinsed
4 Cups chicken stock
1 rib celery, diced
1 carrot, diced
1 small onion, peeled and diced
3 bay leaves
5 sprigs fresh thyme
15 pepper corns, whole
1 tsp whole allspice

Pre heat oven to 300.

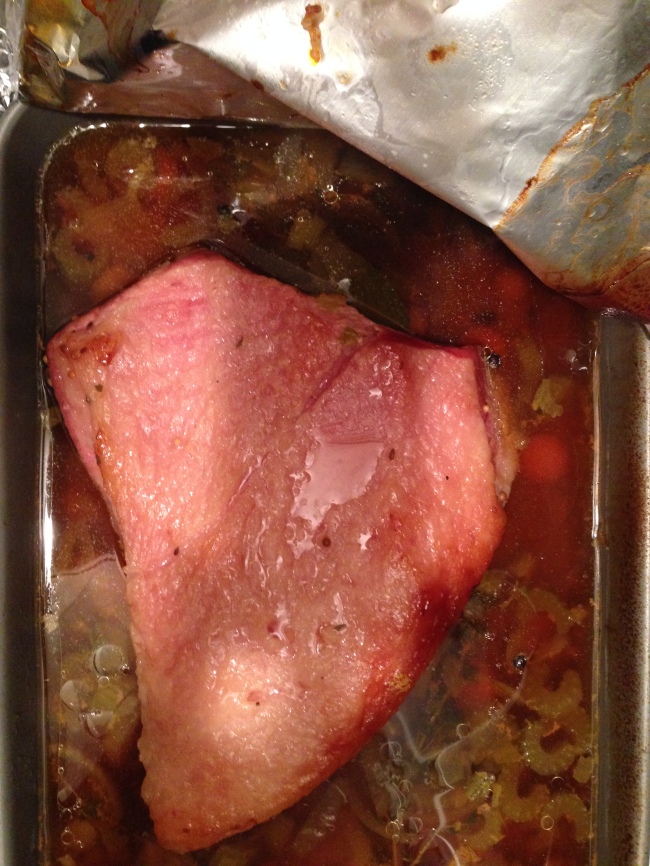
Place all ingredients in a dutch oven, or high-sided roasting pan.  Liquid should cover meat half way, add water as needed to make sure it is half submerged.  Cover tightly with a lid or foil, and braise at 300 for 4.5-5 hours.

Remove meat to a cutting board and let sit for 20 minutes.  While meat rests, strain or scoop out the contents of the cooking liquid, reserving all of the liquid.

After meat has rested, slice and add back to cooking liquid in pan/dutch oven.

Let rest 30 minutes before serving.  You can keep it warm in the oven (turned-off) if needed.

Serve with mustard.

Image

Cabbage, etc.
——————

2 cups cooking liquid from corned beef
1.5 lbs salt potatoes or fingerling potatoes
4 large carrots cut into large chunks
2-3 small onions, peeled and cut in quarters leaving the bulb in tact
1 head cabbage, cut in quarters leaving the core in tact
Salt & Pepper to taste

Add potatoes and cooking liquid to a large soup pot.  Add additional water as needed to cover the potatoes, 1 tsp salt, and bring to a boil.  After cooking about 20 minutes, add in carrots, onions and then set the cabbage on the top.  It will not be fully submerged but it should steam itself.  Boil all together another 15 minutes covered.

Serve veggies with herbed melted butter for added goodness.

Image

Results
——————
Everyone seemed to need a nap after dinner, so I think it was a hit. Special note on Joe’s success, each helping was a full plate. Very impressive.

Image  Image  Image

09.15 – Not Your Average Onion Soup

Fall is just around the corner, and after almost a full year without an official Sunday Dinner, I finally got prodded into getting this show back on the road.

I started with a duck I had stashed in the freezer this spring, and then let the changing weather guide the rest.  The star of the meal was actually an onion soup recipe I found on Epicurious, and trust me, it is worth a try (even though your apt will smell like onions for at least a week, weird!)

Image

~Menu~

Baked Fontina with apples
Marrow Bones with sour dough toast points
Onion soup with onion jam and pickled shallots
Roasted Duck and mixed Italian sausages
Green salad
Cheese Cake by guest Marykate

Image

Pickled Shallots
——————
4 shallots, peeled and thinly sliced into rings
1/4 cup white vinegar
1/4 cup cider vinegar
1/4 cup sugar
1 cup water
1/2 tsp kosher salt
Clean ball jar with lid

Combine vinegars, sugar, water and salt in a small sauce pan and heat to boiling to create a brine.  Pack sliced shallots in clean ball jar.  Once brine reaches boiling, pour over shallots leaving about 1/4 inch space at the top of the jar.  Cover with lid and let cool.  Place jar in fridge once it is at room temperature.  Pickled shallots will be ready in 24 hours, and will last about a month.

* Note this makes a lot of brine.  I used the left-overs to pickle some eggs.  This is as easy as placing peeled, hard-boiled eggs in the brine, in the fridge over night…

Image

Red Onion Jam
——————
1 red onion, peeled and sliced into thin half moons
2 tbsp olive oil
1/4 cup dry red wine
1/4 cup cider vinegar
1 tbsp sugar
1/2 stick of cinnamon
1/2 star anise
1/4 tsp red pepper flakes
2 whole allspice

Saute onion in olive oil in a medium sauce pan for 5-7 minutes over medium heat to soften, but not brown.  Add wine, vinegar, sugar, cinnamon stick, star anise, red pepper flakes, and allspice and bring to a boil.  Reduce to a simmer and cook 40-45 minutes until thick and syrupy.  Add a pinch of salt to taste and move to a clean ball jar.  Eat now, or if making ahead, cover with lid and let cool to room temperature.  Jam will last about 2 weeks in the fridge.

Image

Creamy Onion Soup
——————
1/4 cup olive oil
4 large white onions, peeled and chopped (about 4 cups)
1 leek, whites only, cleaned and chopped
2 celery stalks, chopped
4 cloves garlic, peeled and diced
1 Serrano chili, chopped, seeds and ribs removed (I didn’t and my soup was SPICY, oops)
2 tbsp fresh grated ginger
1/2 cup vermouth
1/2 cup water
1 cup heavy cream
Salt and pepper to taste

In a large stock pot, saute onions and leeks in olive oil for 5 minutes until softened, but not browned.  Add celery, garlic, Serrano and ginger.  Cover and let steam on medium heat for 10 minutes.

Add vermouth and water and bring to a boil.  Boil 4 minutes until liquid has reduced by half.  Cook another 30 minutes, covered.

Take off heat and add in cream.  Puree until smooth.  Finish with salt and pepper to taste.

Serve warm, garnished with onion jam, pickled shallots and garlic crouton.

Garlic Crouton
——————
6 small slices  bread of your choice (I used sour dough)
3 cloves garlic, sliced in half
1/4 cup olive oil

In a cast iron skillet, heat olive oil on medium heat for about a minute.  Add bread and cook a minute or two until browned on bottom.  Flip and brown the second side.  Remove bread from oil and let cool for 5 minutes.  Rub bread (now toast) with raw garlic on both sides and season with a little salt.

Photo Sep 15, 9 00 46 PM

Results
——————
This was a very heavy meal and I managed to make everyone uncomfortably full…yet somehow they were able to rally for Marykate’s cheese cake.

Joe notably finished the cheese cake for dinner a few nights later.

Image Image Image

11.18 – Hong Kong

After a quick trip to Hong Kong over Halloween, mom requested that I attempt to stage a “China Night” when I visit Rochester over Thanksgiving.

This is a tall order considering I have never cooked Chinese food before, nor taken any classes, but everything came out surprisingly well and authentic.  Especially the brisket noodle soup!

~Menu~
Pork Dumplings (Dim Sum)
Brisket Noodle Soup (Cantonese)
African Chicken (Macanese)
Fruit Plate for dessert, courtesy of Mr. Will

Pork Dumplings
————–
1 package of fresh wonton wrappers from the grocery store
1 cup napa cabbage, finely shredded
1/4lb ground pork (not lean)
1 tbsp minced fresh ginger
2 cloves garlic minced
1 tbsp soy sauce
1 & 1/2 tbsp sesame oil
1 egg
1 cup chicken stock

Mix all ingredients, except for wrappers and chicken stock in a large bowl.

To make dumplings, place a small amount of filling in the middle of a wonton wrapper.  Dab a little water around the edges of the wrapper and seal .

Once all filling is gone (should make about 20 dumplings) heat 2 tbsp of olive oil in a skillet with a lid.  Gently place all dumplings in the hot pan and let brown for a minute or two.  Add chicken stock and cover with lid for 5 minutes to steam.  Remove lid and let dumplings cook until almost all stock has boiled away.  Serve warm with dipping sauce of 2 parts soy sauce to 1 part rice vinegar.

Brisket Noodle Soup
————–

– For Stock:
2 lbs beef short ribs (on bone)
1 -2 lbs beef marrow bones
4 quarts water
1 large carrot, roughly chopped
2 stalks celery, roughly chopped
1 medium onion, roughly diced
4 cloves
10 pepper corns
1 handful parsley
1 bay leaf
1 sprig thyme
1 star anise

– For soup
1 lb brisket, with as much fat left in tack as possible
Fresh vermicelli noodles
A little salt and pepper to taste

– For table
Soy Sauce
Rice Wine Vinegar
Sriracha

In a large stock pot place bones, ribs and water. Bring to a boil for 30 minutes. Skim foam off top of stock and lower heat to a slow simmer. Add veggies and spices and simmer for at least 4 hours. (We went closer to 8 hours.) Strain stock when ready to make soup. Discard veggies, bones and spices. Pull off any rib meat and add back to the stock.

To make soup, slice brisket into bit-sized pieces and simmer 30 minutes until cooked. At the same time bring 2 quarts water to boil in a separate pot and cook noodles as directed (probably about 2 minutes).

To serve, place pasta in bottom of a soup bowl. Cover with stock, some meat from stock pot, and a little salt and pepper (remember you have not salted the stock, so it will need some).

At the table add a little soy sauce, vinegar, and srirach to taste.

African Chicken
————–
This is a traditional restaurant-created dish from Macau.

1 whole chicken (5-7 lbs)

– Marinade
8 cloves garlic, peeled
2 fresh bay leaves
1 tsp paprika
1 tsp kosher salt
2 fresh Serrano chilies, stems removed
2 tbsp olive oil

-For Basting
4 cloves garlic, peels and minced
1 tbsp olive oil
1 can Coconut Milk

-To accompany
2 russet potatoes
2 tbsp olive oil
salt

24 hours in advance. Cut chicken’s back bone to flatten the bird into one flat piece connected by the breast bone. Food process all marinade ingredients into a fine paste and cover the chicken carcass. Cover with plastic wrap in a casserole dish and let marinade over night, up to 24 hours, refrigerated.

Pre heat oven to 400 degrees.

To cook, remove chicken from fridge and let it come up to room temperature while you mix up the basting sauce and chop the un-peeled russet potatoes into french fry-sized slices. Toss potatoes with olive oil and salt on a cookie sheet.

Bake the chicken at 400 degrees for 1 hour, basting every 15 minutes with 1/3rd of the basting sauce. At the end all sauce should make it over chicken and into casserole dish to serve along side it.

At the 40 minute mark, add cookie sheet of french fries into the oven as well, they should be done at the same time as the chicken (they need about 20 minutes at 400).

To serve place chicken on a platter over the fries and coat liberally with sauce.

Fruit
————–

Results
————–
Will ate an impressive amount of food, but especially made room for a second full bowl of noodle soup. I did as well, so good!!!


7.13 – Fittest Chili on Earth

Image

After a full year of trying to pick up heavy things and become more useful, I am at least able to truly understand and appreciate Rich Froning’s snatch.  I am also getting pretty good at meat-themed dinners, including this paleo feast thrown in honor of the first night of the 2012 Crossfit Games.

Inspired by earlier chili experiments at Joe’s apartment, I decided to go for maximum meat and flavor.  While I prepared the food, Joe did a little games decorating.

Image

Fittest Chili on Earth
————–
1 lb grass-fed ground beef
1lb pork sausage
1 12oz sirloin steak, finally chopped (I got nervous there was not enough meat so stole this from Joe’s fridge)
2 bell peppers, finely chopped
2 jalapeno peppers, finely chopped
1 large spanish onion, peeled and diced
1 16 oz can of diced tomatoes with their juice
4 cloves garlic, peeled and minced
4 dried guajillo or pasilla chiles, soaked in warm water for 20 minutes, stemmed and finely chopped
1/2 cup beef stock
2 tbsp balsamic vinegar
1 tbsp Worcestershire sauce
4 tbsp chili power (Joe likes to go heavy on this)
1 tbsp ground cumin
1 tbsp granulated garlic
1 tbsp hot sauce of your choice (we used cholula)
1/2 tsp ground cinnamon
1/2 tsp cayenne
Salt and Pepper to taste

Image

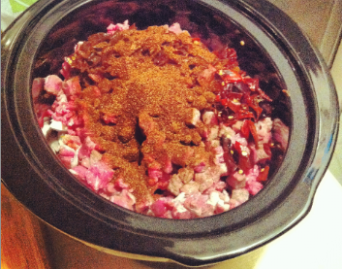
In a crock pot combine all ingredients above and mix together with your hands.  The meat and veggies should become the consistency of loose meatloaf.  Cook in crock-pot on high setting for 12 hours, overnight is the best plan. Add a little beef stock if needed during the cooking process, or if too runny, finish the last hour with the lid off to thicken.

Garnish with guacamole

Results
————–

To ensure the that the event was judged fairly, we invited Coach (and part owner of CrossfitNYC) Court Wing to our Games Day Feast.  After three helpings, Court snuck away with a container of leftovers… “to share with his family.”

Image Image Image

The boys (Joe and my brother, Mr. Will) waited until everyone else went home to polish off an extra lb of Heritage Meats

Image

…and snuggle. Just like two peas in a pod.

Image

2.12 – These Bones are Bananas

With the success of last week’s heart, and my growing relationship with the Heritage Meats Butchers, I’ve decided to commit to a full year of nose to tail dining (and posts for that matter).  Tonight’s early birthday dinner for Danielle will feature bone marrow.  Look forward to beef cheeks, pig trotters, lamb sweetbreads, and more to follow in the near future.

~ Danielle’s early birthday dinner Menu ~
> Apps
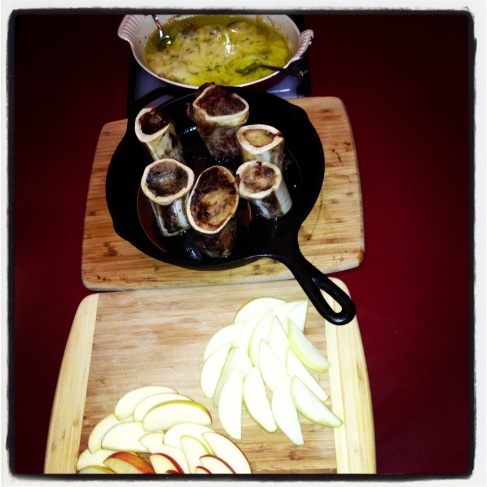
Bone Marrow on toast
Assorted potted German sausage “everything a man likes to eat”
“Meat sticks” made with Heritage Meats hot sopressata
Radish and cucumber slices – cleans the palate for main course
> Main
Chicken Pot Pie (the classic)
> Dessert
Banana Pudding

Bone Marrow
——————
Buy marrow bones from the butcher cleaned of meat
These are generally cow leg bones, but can be pork too, if you can find it
I kept mine full slices, but you can request to split the bones length-wise for easier extraction of marrow as you like.

4 Marrow Bones
Fresh Baguette or french bread, sliced and lightly toasted
Good sea salt
Fresh parsley and butter to taste

Place marrow bones upright in a casserole dish with decent sides. Some of the marrow will bake out of the bones during cooking and you might lose it in your oven if you use a cookie sheet.

Bake 15-20 minutes at 400 degrees until tops look browned and a metal skewer inserted down into the center of the bone feels warm to touch on your wrist.

Sprinkle with fresh parsley as desired and serve immediately. Guests should spread on toast and add a little sea salt (and a little butter if they are crazy like me).

DO NOT THROW OUT the leftover fat in your baking dish. Put it in the fridge and use as you would duck fat to coat roasted vegetables, add to soup stocks for richness, etc.

Banana Pudding
——————
(Mom’s recipe from my childhood)

3/4 cup sugar
1/4 cup cornstarch
1/8 teaspoon salt
3 cups milk (whole, not skim, this is dessert!)
3 egg yolks beaten
1.5 tablespoons butter or margarine
1 teaspoon vanilla extract
2 small bananas
Vanilla Wafer cookies

In a large saucepan, combine sugar, cornstarch and salt. Separate eggs and whisk the yolks into the milk until just combined.

Beat milk/eggs in to the sauce pan of sugar, etc. until combined and set over medium heat. Continue to stir pudding constantly until it simmers and has thickened up. If you do not stir you will get a yucky film on the surface…

Once thickened, and bubbles appear, turn off heat and stir for 30 seconds to cool slightly. Add in pat of butter and vanilla and taste to make sure you have a solid vanilla pudding (do not eat the whole thing, no matter how much you want too…I know its amazing warm)

Line a pretty glass serving bowl with a layer of vanilla wafers and slices of ripe bananas. Pour warm pudding over the top and add more bananas/wafers to decorate as desired. You can serve immediately, or chill for up to 24 hours.

If chilling, cover exposed surface with plastic wrap and add top decoration when you serve to keep a film from forming on top in the fridge and bananas from turning brown.

Results
——————
Hard to judge considering everyone cleaned out their own personal marrow bone (a serving usually given to 2 people) then proceeded to have large slices of chicken pot pie on top. I’ll give Danielle the win since the left over pie and pudding (tiny as it was) didn’t survive the 48 hour mark post dinner. Happy Birthday D!


1.29 – The heart of Peru

Last weekend I impulse-bought a beautiful pig’s heart from Heritage Meat, and immediately thought of my past trip to Peru. I’ve made anticuchos a few times with stew beef before, but am psyched to actually have a heart to work with for a change.

I also have some beautiful curtains my mom made for the new place, and apparently no ability to use a drill – so by way of a bribe, I decided to throw a small dinner party/curtain-hanging this sunday. Dinner for drapes…

~Menu~
Olives, sun-dried tomatoes, gouda cheese = curtain-hanging energy
Chicken Soup (because we had soup with every meal in Peru – they love it?)
Anticuchos
“Cuy-ish” Chicken with Salsa Creole
Baby kale salad with feta (this is not Peruvian…)

*Important Note:
My Peruvian cookbook, bought in Lima, is the world’s worst translation of traditional recipes with little to no detail. This is my guess based on the ingredients I could understand.

Anticuchos
——————
1 pig or beef heart (maybe buy two pig hearts, I wish I had more)
2 cups red wine vinegar
2 cloves garlic, minced
1 tbsp cumin seeds
2 tbsp red pepper flakes (or minced fresh hot pepper of your choice)
1 bay leaf
Salt & Pepper to taste

First clean the heart. I did this by rinsing it, cutting it open vertically, and trimming off any silver-skin and/or sinew I saw.  I left the outside fat in tact. The heart came out very tender, so this seemed to do the trick.

Once clean, slice heart into bite-sized chunks (like stew beef, which apparently is the Quechua translation of “Anticuchos” anyhow).

Make marinade by combining all other ingredients in a large bowl or zip-loc bag. Place heart chunks in marinade and refrigerate for 12 hours (I went 24…it was fine).

To cook, place marinated heart on skewers and grill over high heat for about a minute on each side. These should be served rare-medium rare to stay tender (plus the heart is already chemically cooked by the vinegar anyhow.) Because I am still getting use to the new kitchen’s ventilation issues, I decided to brown and finish in the oven. Not as good as a barbecue, but pretty tasty anyhow.

Cuy-ish Chicken
——————
Cuy is a traditional and everyday dish of grilled or fried Guinea pig. Apologies to anyone who has had Guinea pigs as pets, but they really are quiet tasty. That said, I don’t have the heart, or the equipment to buy and prepare live ones here in NYC…so I decided to make something a little more accessible.

My hope was to use quail, or small Cornish game hens, as they would look like small vermin, but sadly the only option left on a Sunday afternoon was whole chickens…so I cut one up into to Cuy-sized chunks and followed the Cuy recipe as printed.

Small Animals of your choosing
Garlic, Salt & Pepper to taste
3 tbsp salt
3 tbsp sugar
2 tbsp hot paprika

In a large bowl make a brine of salt, sugar, paprika and about 2 cups warm tap water. Stir till dissolved, and add a few ice cubes to bring the temperature down. Butcher your chicken into large pieces, or skin your Cuy. Place meat in brine and leave in fridge for a few hour.

When ready to cook, remove meat from brine and pat dry with paper towel. Season with salt, pepper, and garlic. Heat a 1/4 inch of olive oil in a cast iron skillet and fry meat until brown. If you’re using Cuy, fry it through…chicken you can finish in the oven (about 15-20 minutes on 350) if you are afraid of your ventilation like me.

Serve warm with Salsa Creole

Salsa Creole
——————
1 red onion, thinly sliced
1-2 hot peppers (Serrano or jalapeno)
1/4 cup cilantro (I used parsley this time)
Juice of 1 lemon
Salt & Pepper to taste.

Combine all ingredients and let marinate at least 45 minutes before serving.

Results
——————
I had three heart skewers left-over last night. I put two in a box over the remaining kale salad and went to bed dreaming of the delicious lunch I would have today…someone seems to have stolen my lunch for herself this morning.
I consider this a huge success!